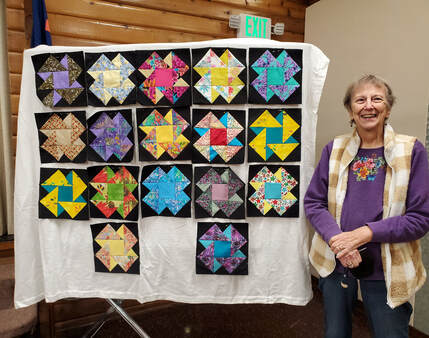
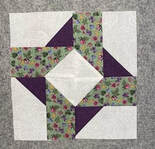
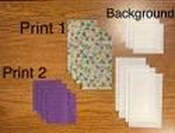
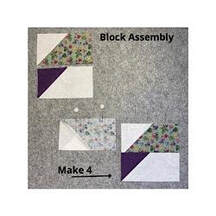
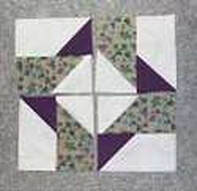
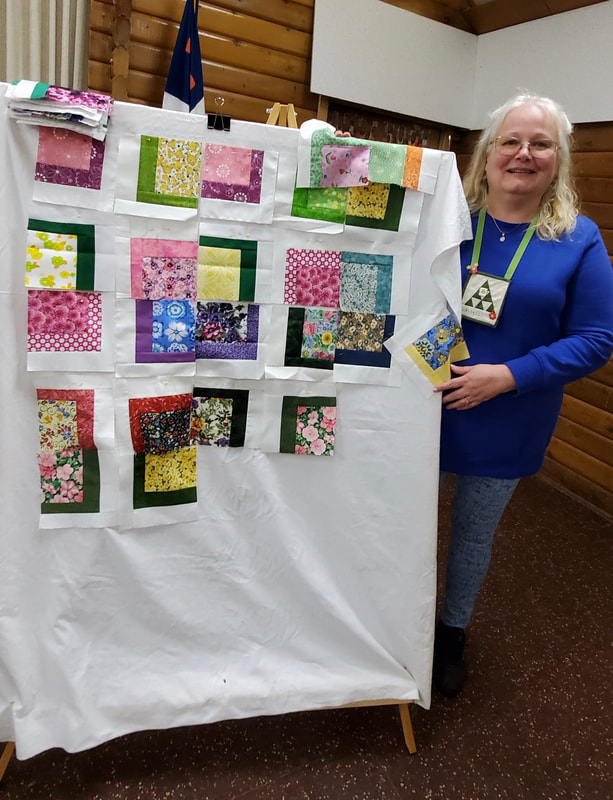
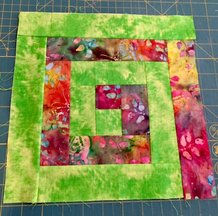
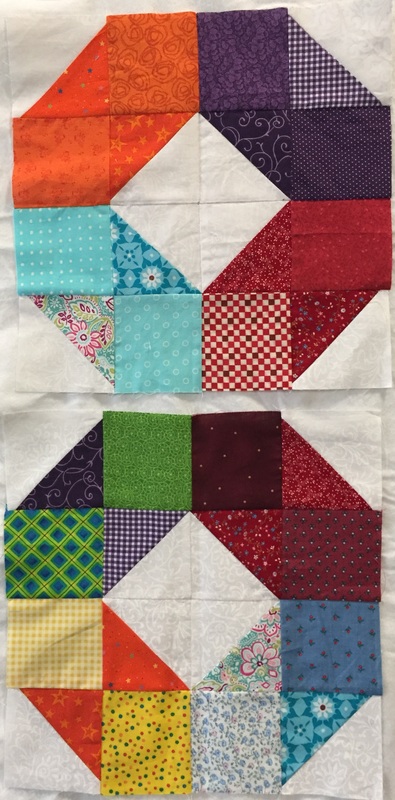
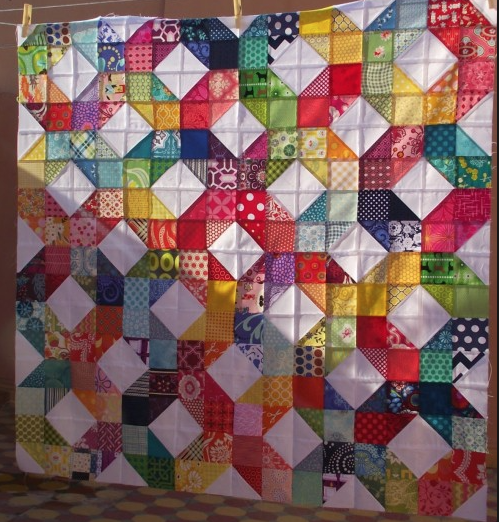
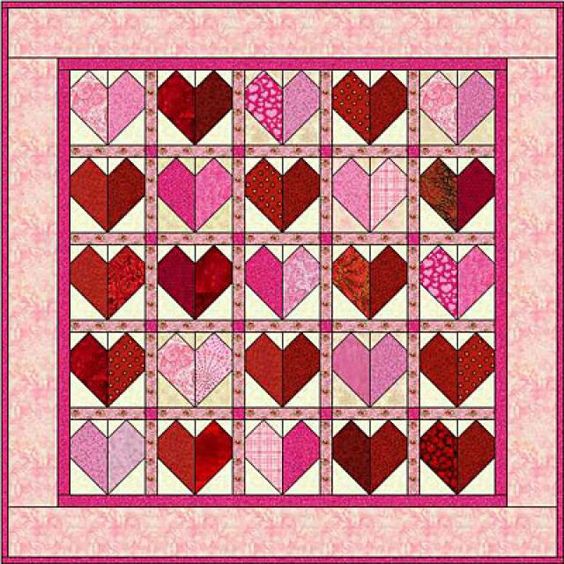
February 2024 Opportunity Block - Surrounded by Love - due Mar business mtg
Jessica S. won all the heart blocks---Congratulations!
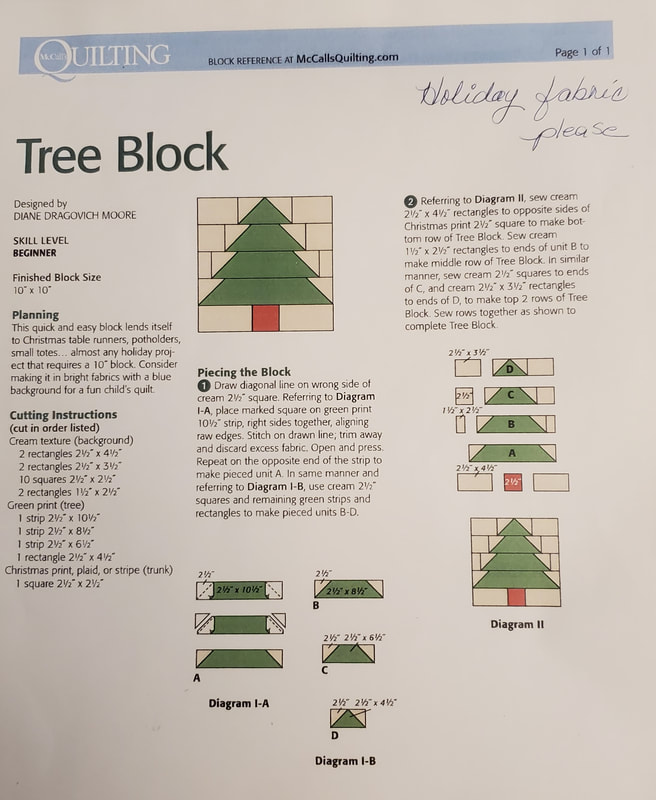
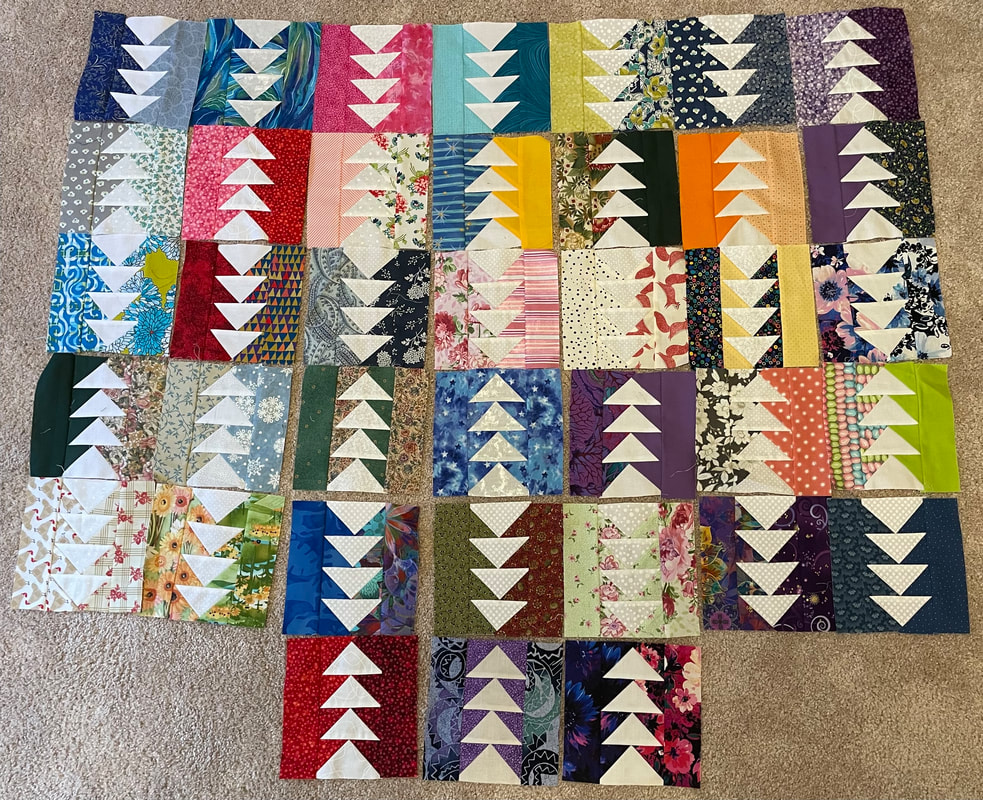
October 2023 Opportunity Block - Tree Block - due Dec business mtg
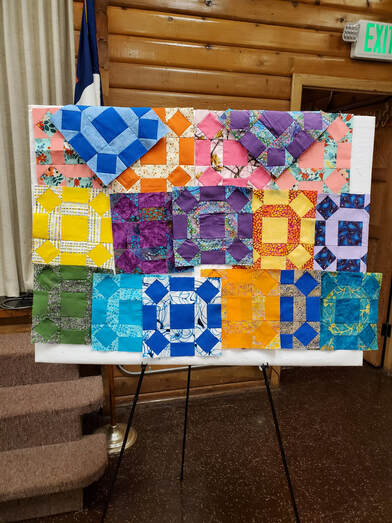
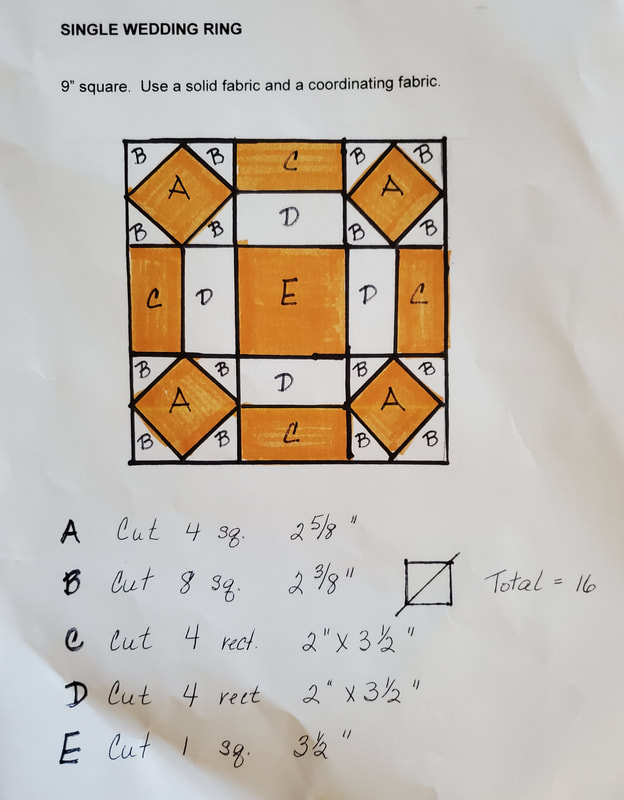
July 2023 Opportinity Block - Single Wedding Ring - due at Oct business mtg
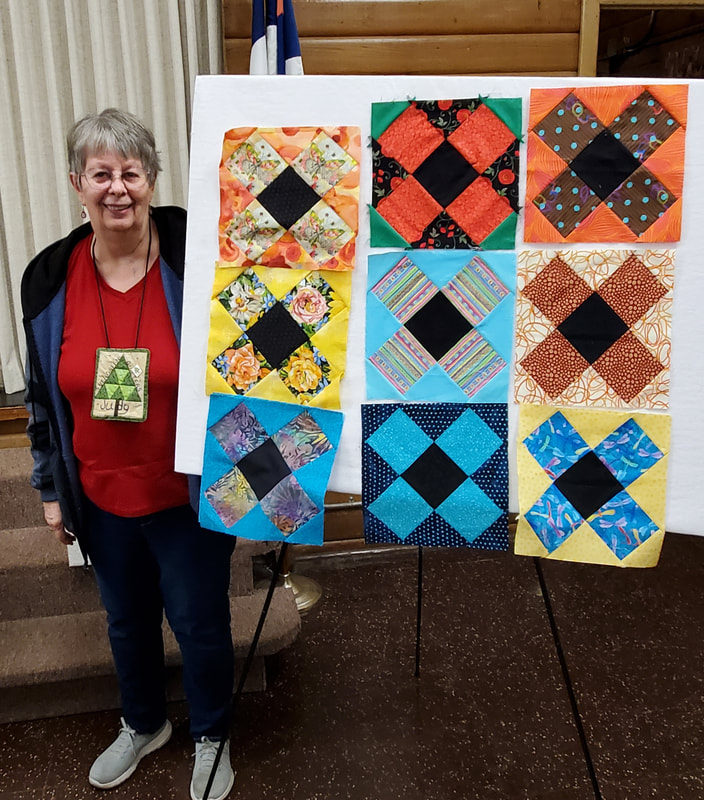
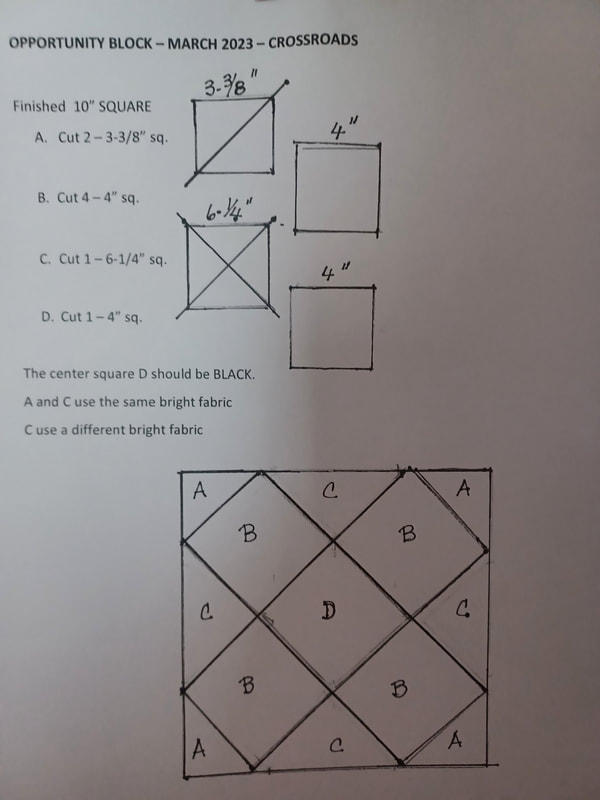
March 2023 Opportunity Block- Crossroads - Due at May 2023 business mtg
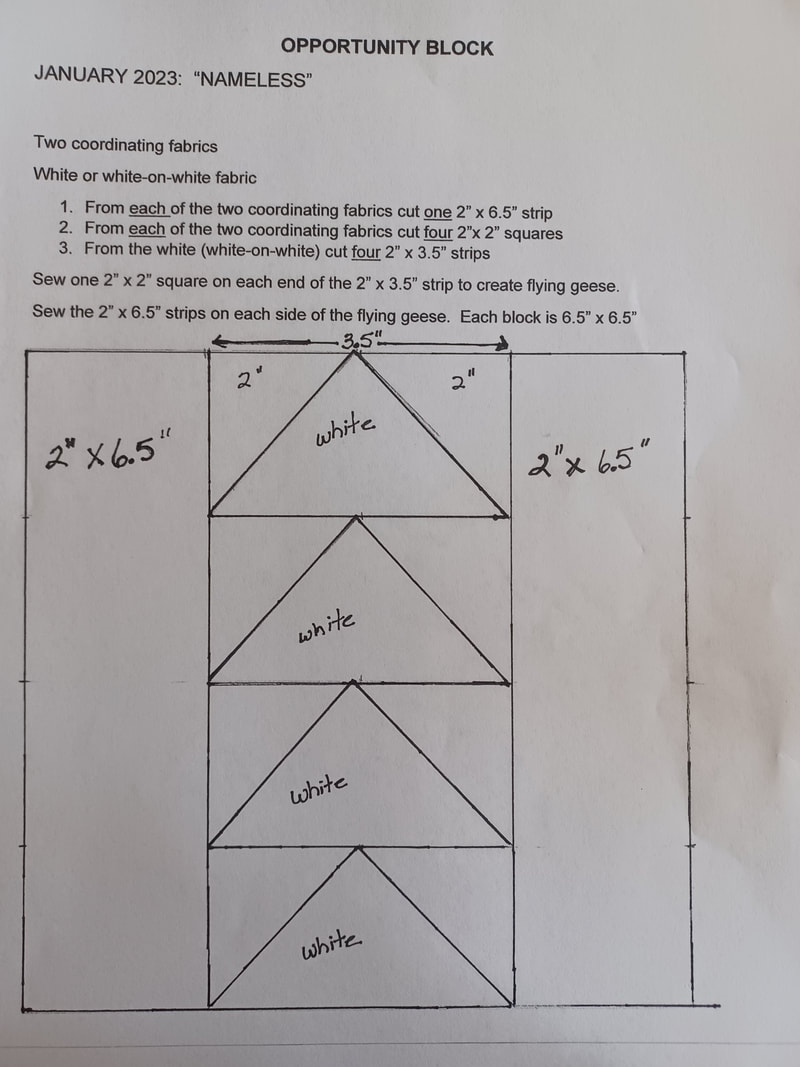
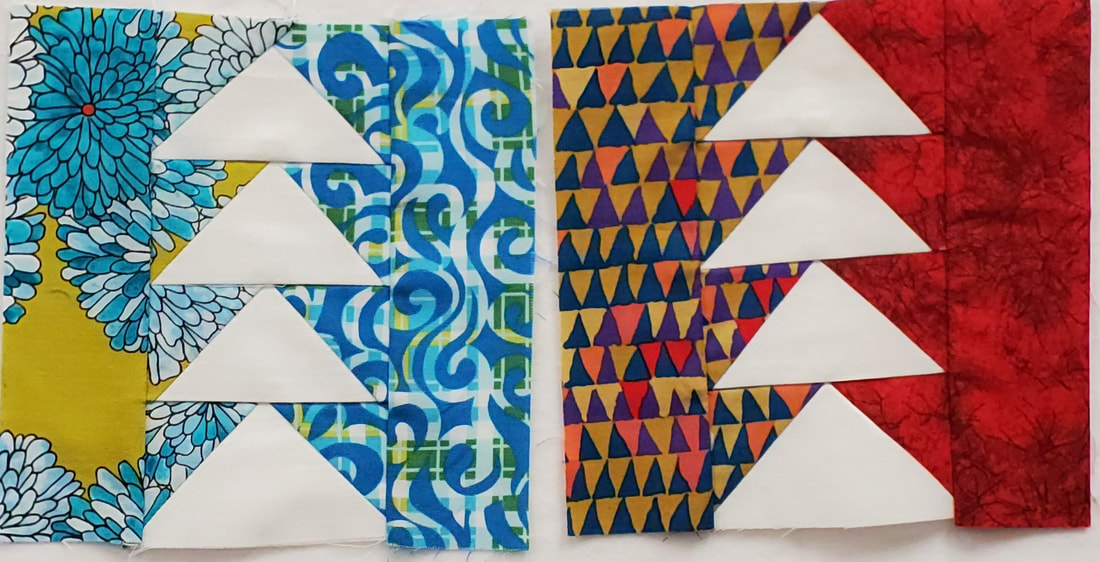
January 2023 Opportunity block -Nameless due at Mar 2023 business mtg
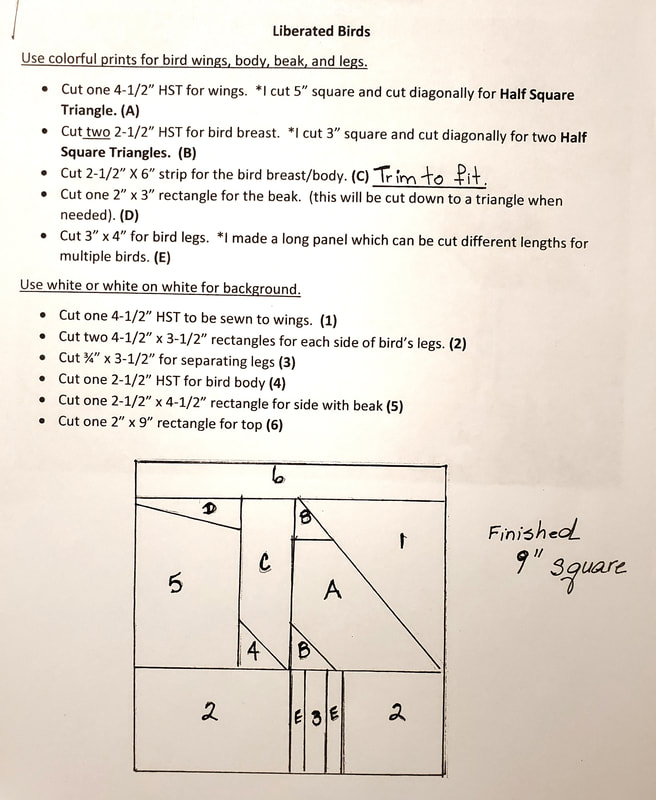
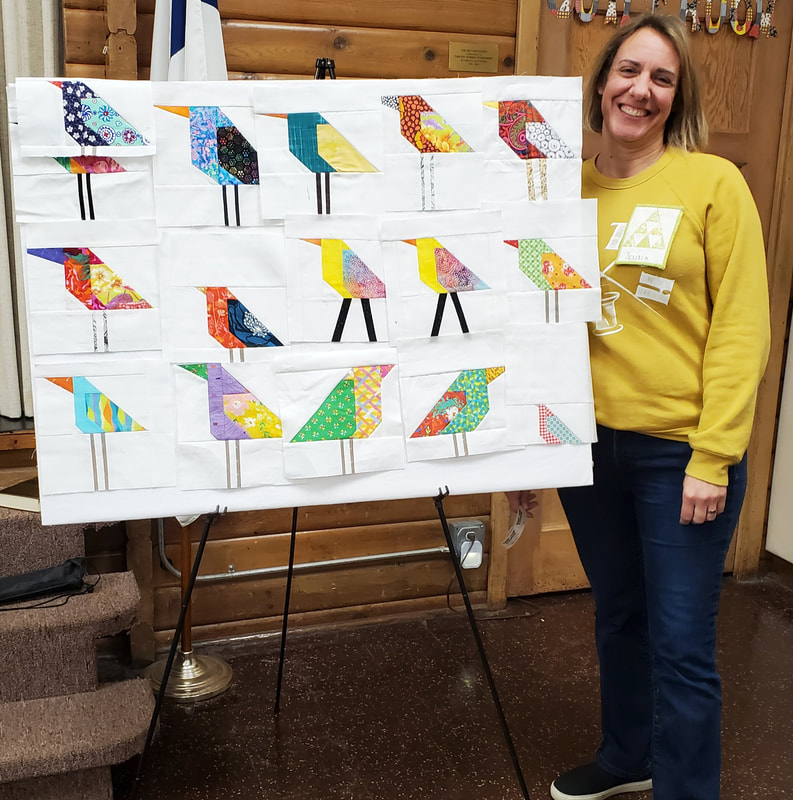
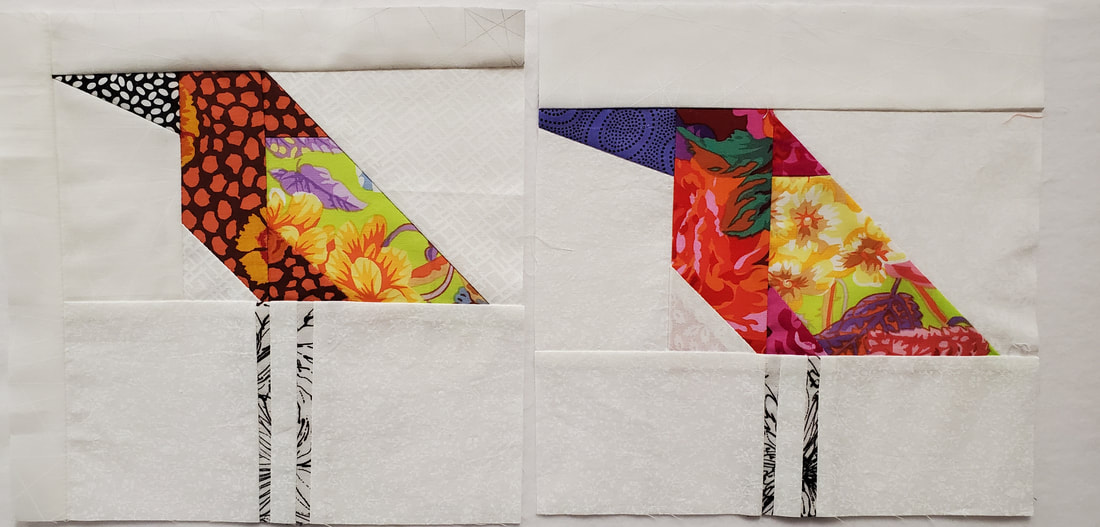
November 2022 Opportunity block - Liberated Birds - due at Jan 2023 business mtg
Congratulations to Jessica for winning all these Liberated Bird blocks!
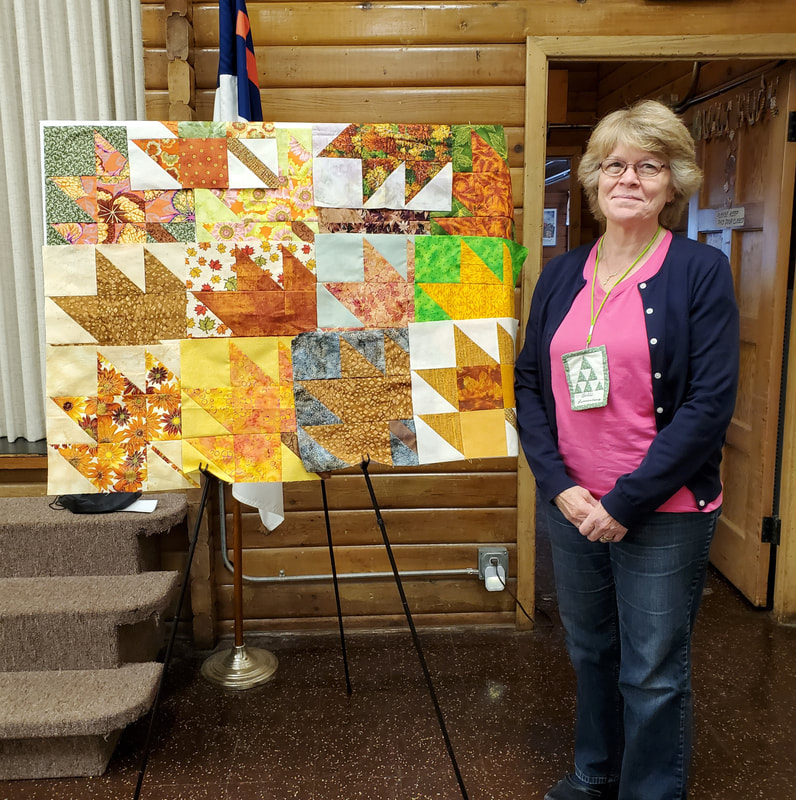
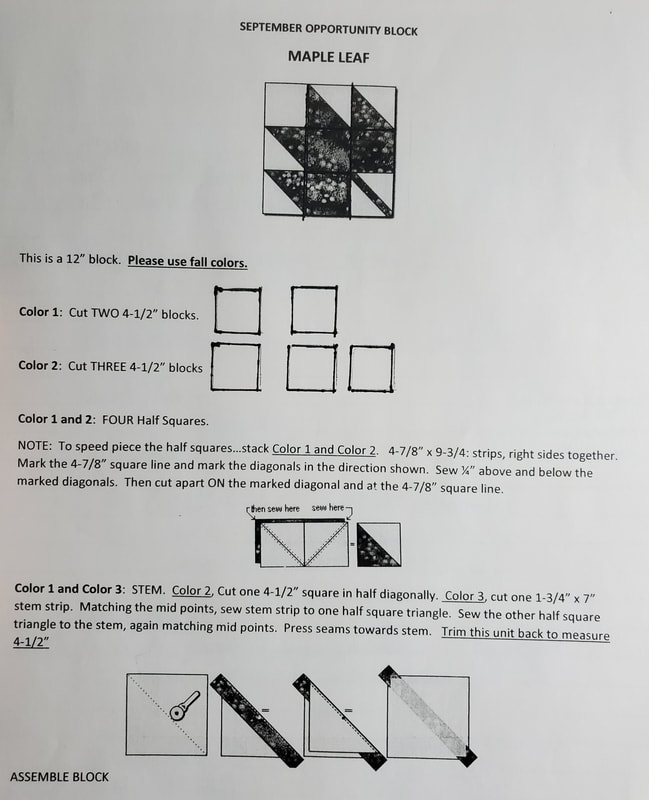
September 2022 Opportunity block - Maple Leaf - due at Nov business mtg
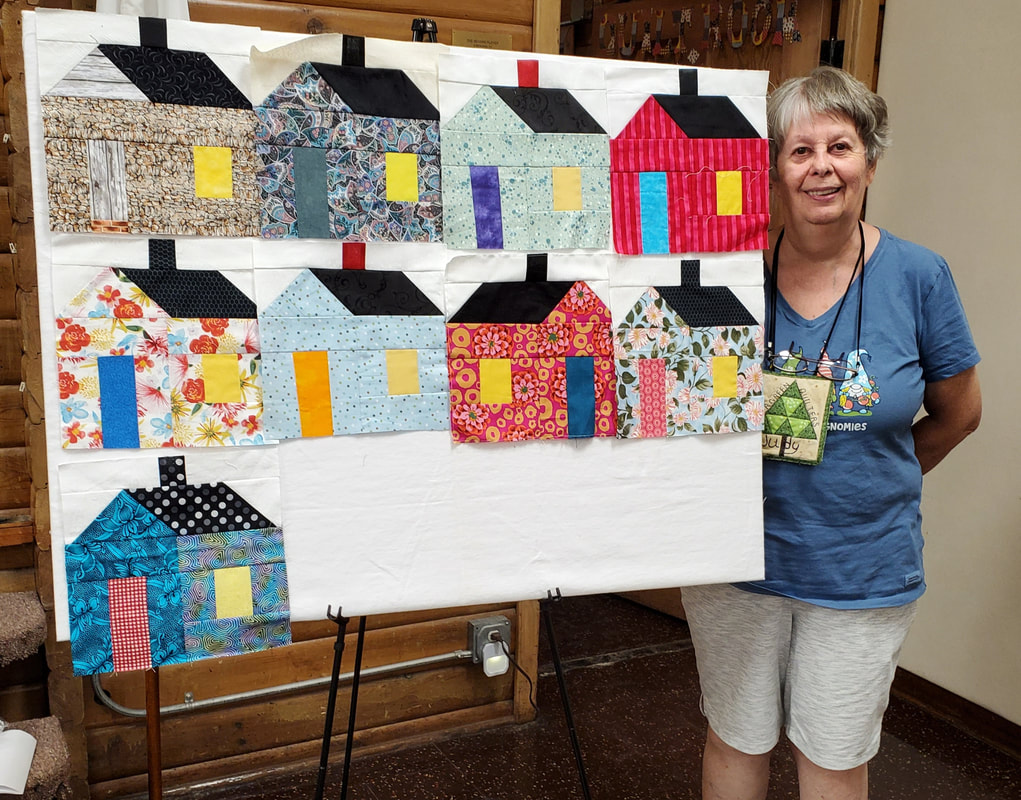
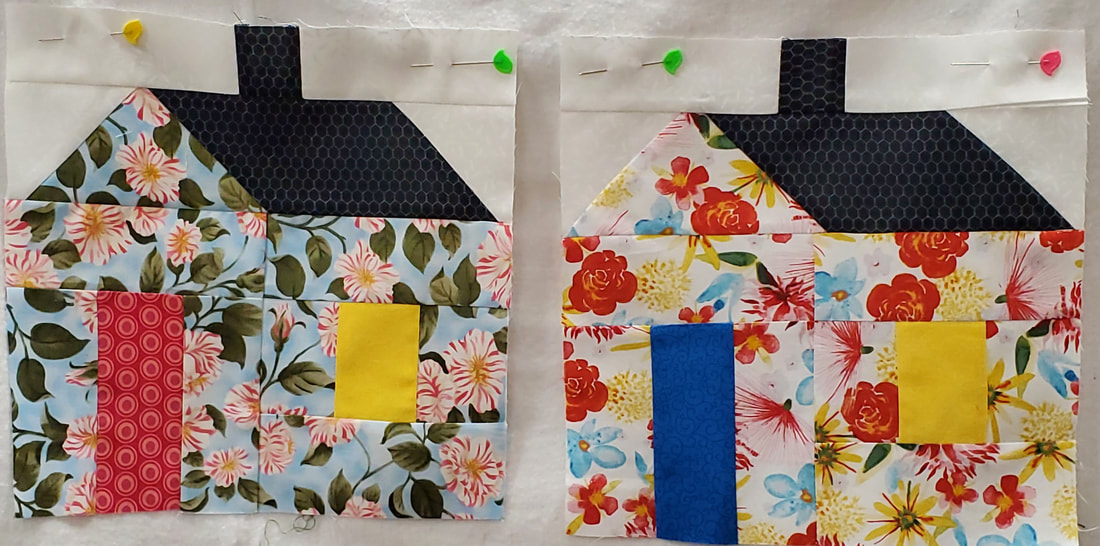
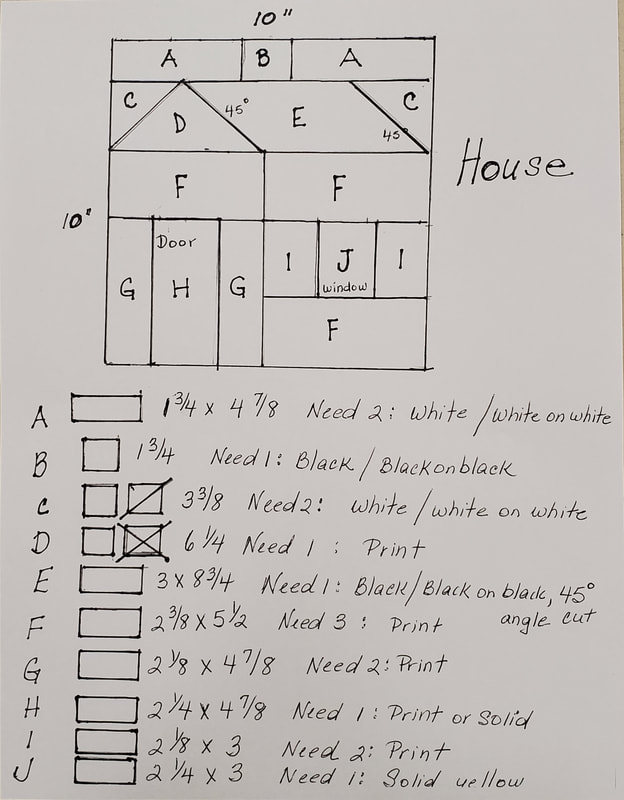
July 2022 Opportunity Block - House - due at Sept business mtg
Congratulations to Judy T. for winning these blocks!
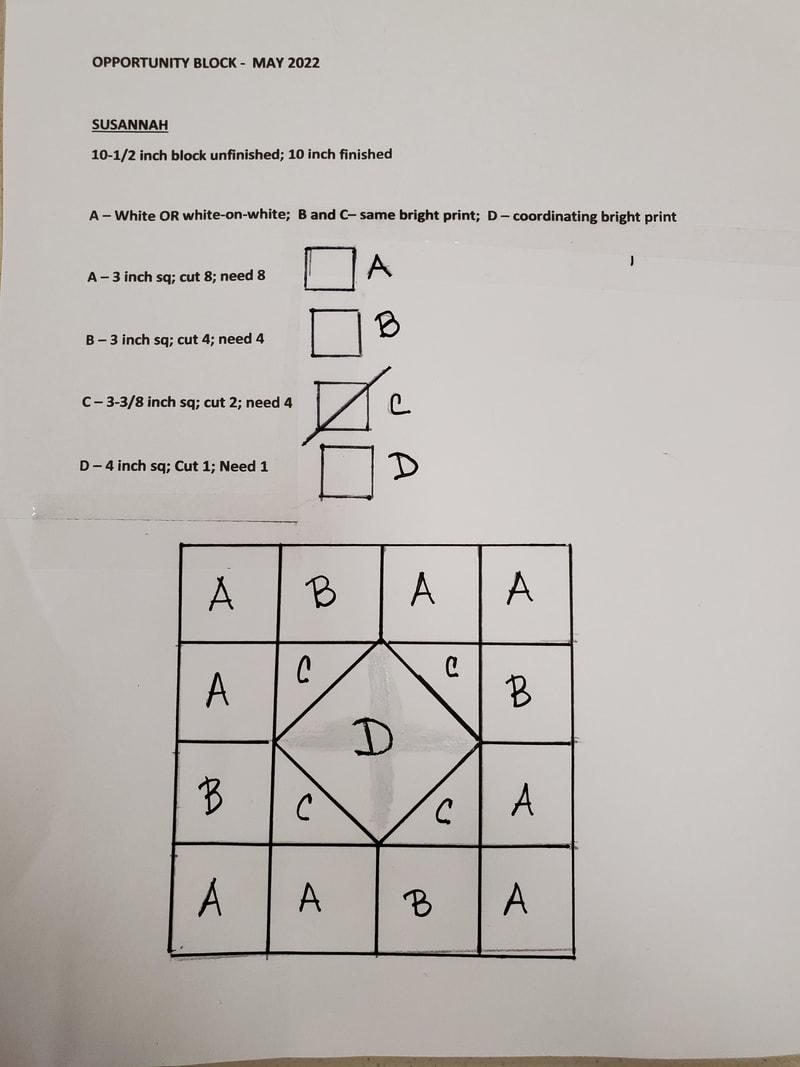
May 2022 Opportunity Block - Susannah - due at July business mtg
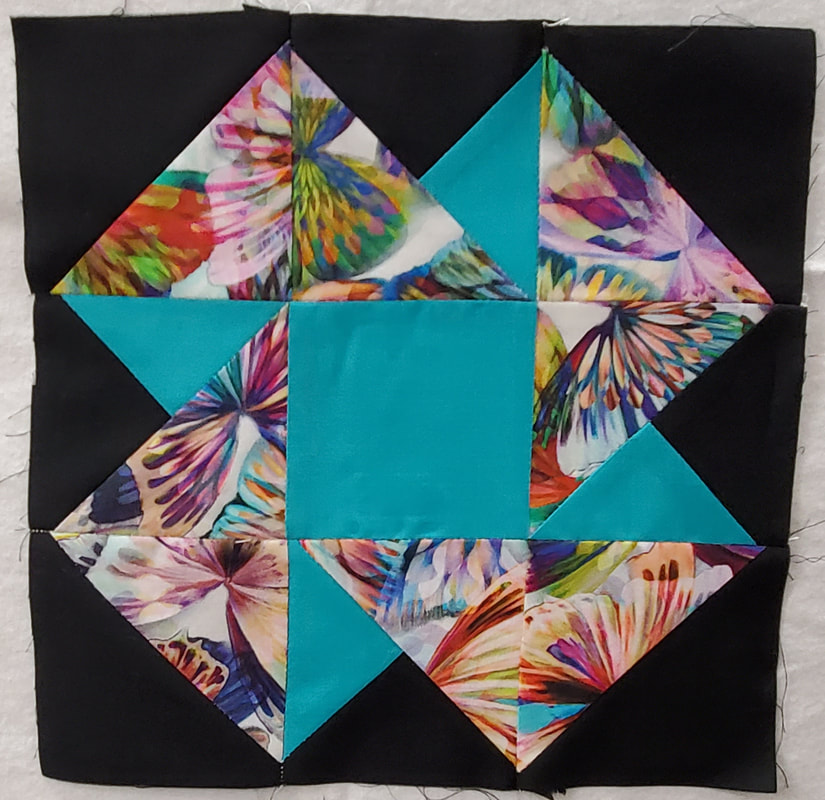
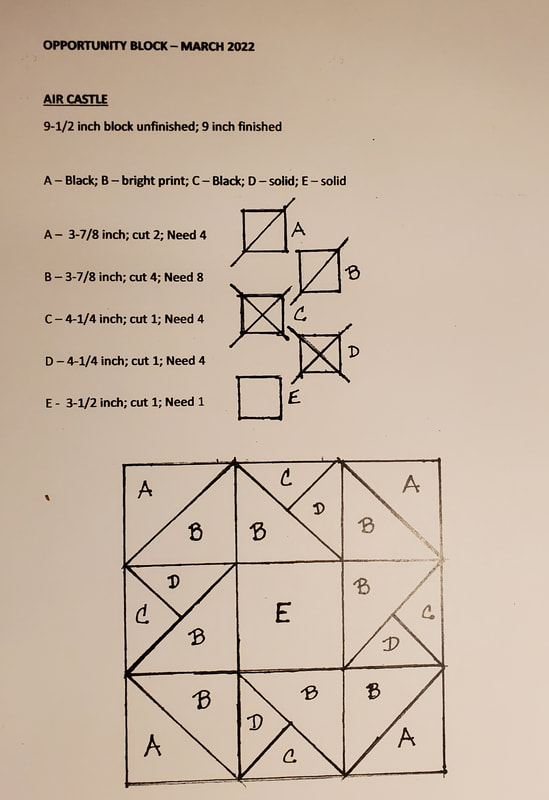
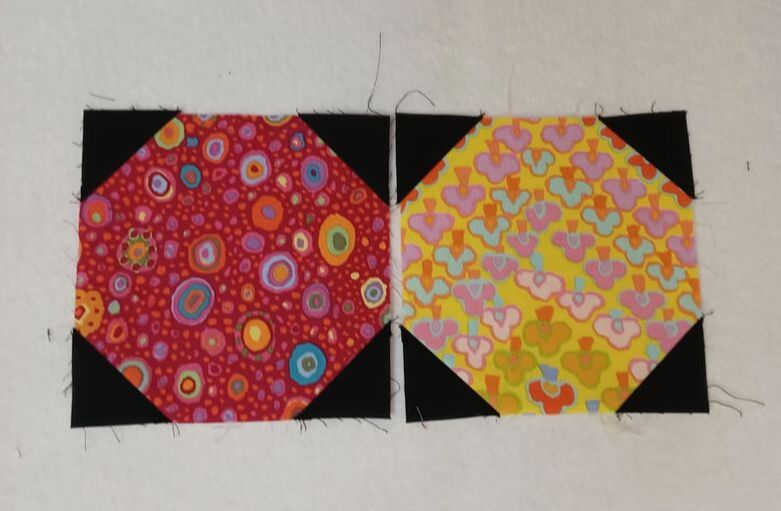
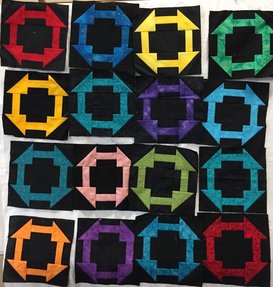
March 2022 Opportunity block - Air Castle - due at May business mtg
Please use black for the background color. Choose a print and a solid that coordinates with the print.
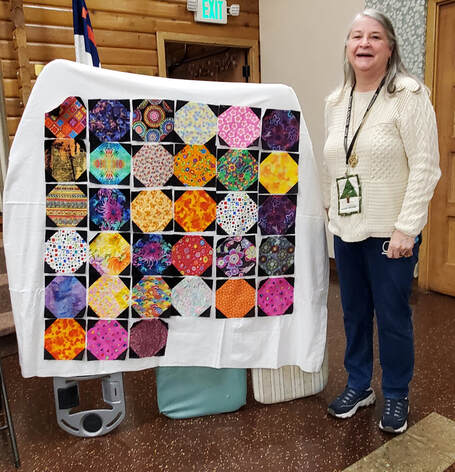
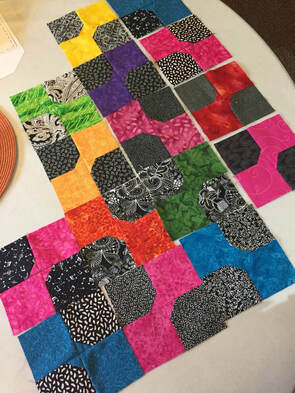
January 2022 Opportunity block -Colorful Snowballs - due in March
Congratulations to Sue P for winning these blocks!
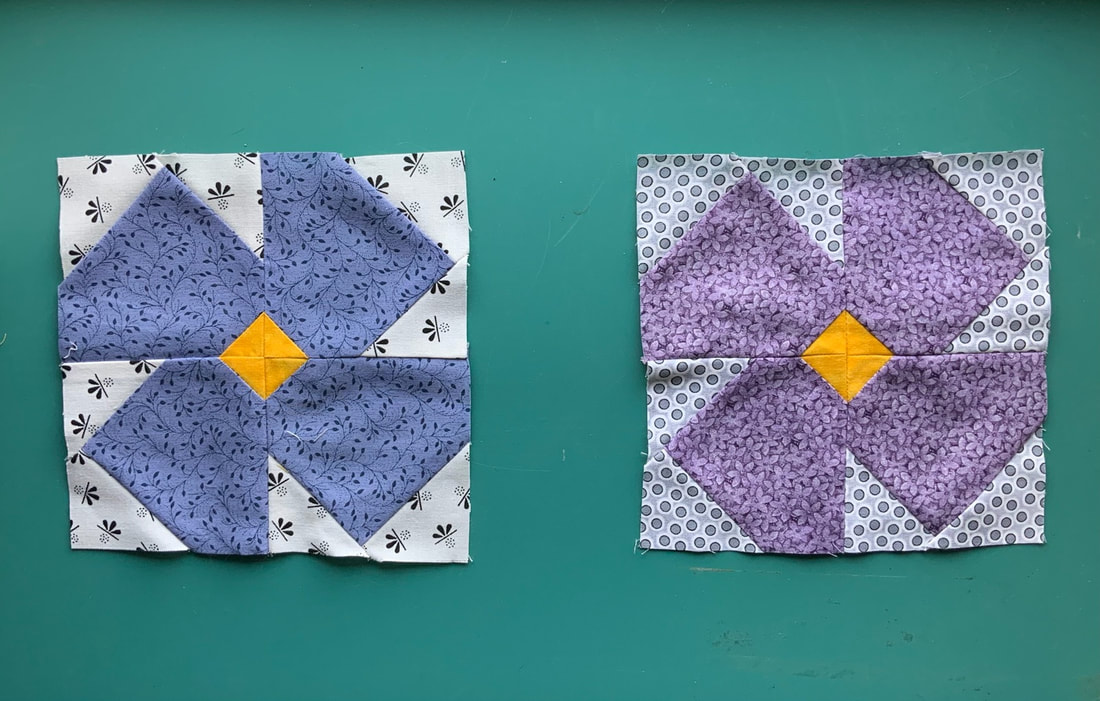
May Flowers - due July 2021
Congratulations to Pam N. for winning these May flowers at our July business meeting!
|
May Flowers: 6-1⁄2” unfinished
Fabrics needed: Let’s make a riot of colors and textures! Flower Petals: Spring and/or Summer colors in solids, batiks, tone on tone prints, or prints that “read” as mainly one color. Should have good contrast between petals, centers and backgrounds. Flower Centers: Yellows to Oranges with high contrast to flower petal fabric choice. Solids, batiks or prints that “read” as solid from a 2 foot distance. Should have good contrast between petals, centers and backgrounds. Background: White, off-white, gray or black. Solids, batiks, or prints. Should have good contrast between petals, centers and backgrounds. Cutting Instructions: Flower Petals: cut four (4) 3-1⁄2” squares Flower Centers: cut four (4) 1-1⁄4” squares Background: cut eight (8) 2” squares Construction:
|
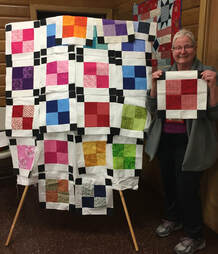
January 2021 - Intertwined Square - due in March
Dawn L was the winner of these fabulous blocks....congratulations, Dawn!
|
If we are still not meeting in person this coming March, pictures of the blocks are due Sunday, February 28, 2021. This will give me the time needed to create a composite picture to share during our Zoom meeting and to use a random number generator to draw for the winner of all the blocks. Then participants will mail their blocks directly to the winner.
Please, if you give your block to someone to give to me, or if you hand your block to me in advance of the drawing, please safety-pin or staple your name to the back of your block(s). Please do not use straight pins or paper clips. Intertwined Square 8” finished size (8-1⁄2” unfinished) Fabric Required: 2 prints - colors of your choice (good contrast between all 3 colors is essential) 1 background - white, off-white, cream, very light tan. Solids or Tone-on-Tone. No colors in background fabric, please. If making multiple blocks, prints can be used again, but please vary position to keep each block unique. Cutting: Print 1: 4 - 4-1⁄2” x 2-1⁄2” Print 2: 4 - 2-1⁄2” x 2-1⁄2” Background: 4 - 4-1⁄2” x 2-1⁄2” 4 - 2-1⁄2” x 2-1⁄2” Assembly: 1. Draw a diagonal line across all 2-1⁄2” x 2-1⁄2” squares 2. Pair Print 1 4-1⁄2” x 2-1⁄2” and Background 2-1⁄2” square. “Snowball” Print 1 with Background square. Do all 4 same way. 3. Pair Background 4-1⁄2”x 2-1⁄2” and Print 2 2-1⁄2” x 1-1⁄2” square. Snowball Background with Print 2. Do all 4 same way. Note: when I make HSTs, I always stitch 1⁄2" away from first diagonal sewn line then trim apart between the stitched lines. Save for another project. 4. Using picture as reference, pair Print 1 rectangle to Background rectangle. Do both sets same way. 5. Using picture as reference, complete block. |
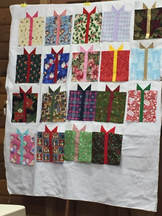
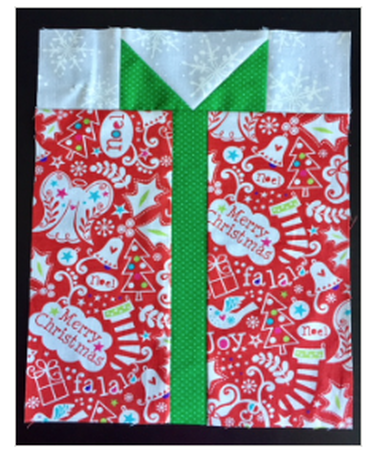
December 2020 - Small Christmas Presents - due in January, 2021
Congratulations to Merdie M. for winning this Opportunity block!
If there are any outstanding blocks not turned in, please send them directly to Merdie.
If there are any outstanding blocks not turned in, please send them directly to Merdie.
|
Small Christmas Presents:
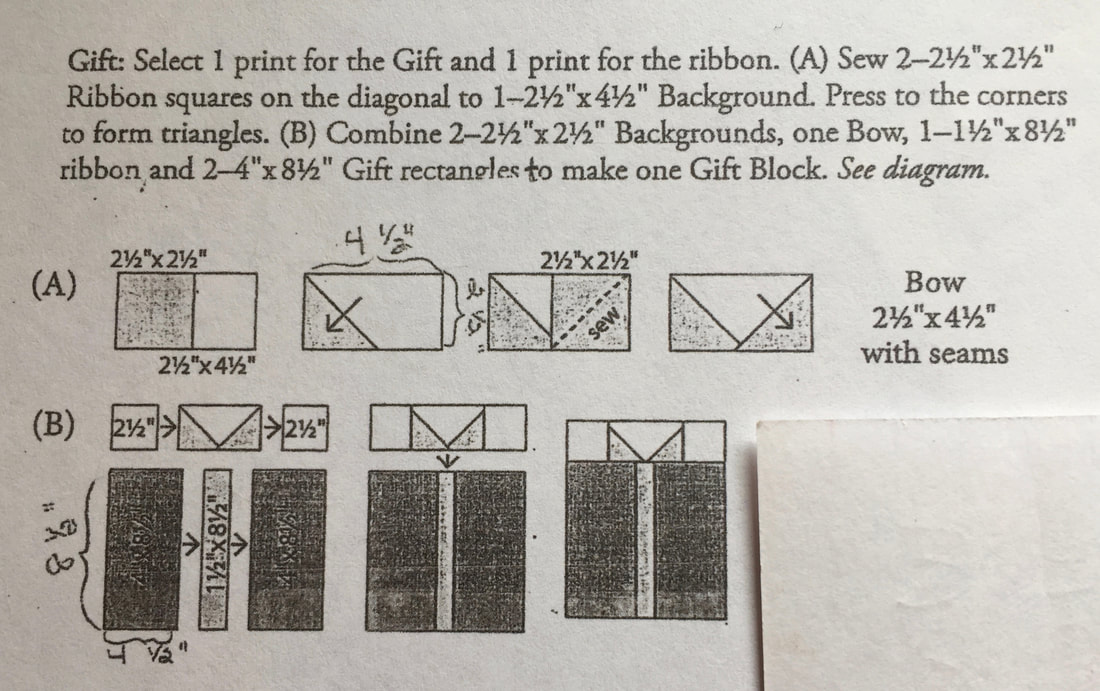
Fabrics: 2 coordinating Christmas prints (If using same prints for multiple blocks, please reverse locations) 1 background White or White TOT Cutting instructions: Box: Christmas print: 2 - 4-½”x 2-½” Ribbon: 1 - 4-½” x 1” Bow: 2nd Christmas print: 2 - 1-½”x 1-½” Background white: 1 - 1-½” x 2-½” Background white: 2 - 1-3/4" x 1-3/4” Assemble: Sew ribbon strip between the two box prints Bow block: Sew one 1 1/2"x 1 1/2" xmas print block on two adjacent corners of the large white block. Trim and press. Sew one small white square on each end of the bow block. Sew bow assembly on top of box assembly |
January 7, 2020 - Floral 1/4 log cabin - due March 3, 2020
|
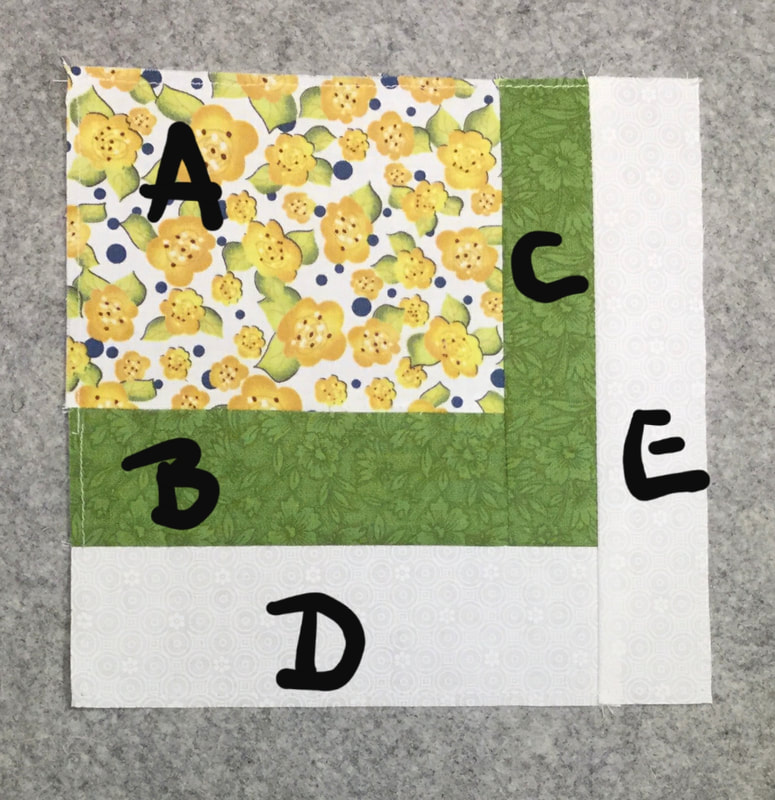
Floral 1⁄4 Log Cabin This block is 6-1⁄2” square. Block A is rectangular. It should be a floral print. Blocks B & C should be the same coordinating print or a solid taken from colors in Block A. Blocks D & E should be white or white tone-on-tone - no colors Cut: A - 1 - Floral print 5”x 4” B - 1 - Coordinating print 2”x 5” C - 1 - same Coordinating print 1-1⁄2”x 5-1⁄2” D - 1 - White 2”x 6” E - 1 - White 1-1⁄2”x 7” 1⁄8” stay-stitching helps keep traveling blocks from fraying |
November 5, 2019 -Geramiums block - due Jan 7, 2020
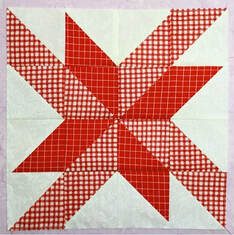
This month’s Opportunity Block is called Geraniums (Pat Sloan’s A Flower Bouquet Sampler Quilt Block 8/20) Click here for directions/tutorial online Colors: White or white TOT (tone on tone) Your choice of color in 2 shades ie dark red and light red, purple and lavender, etc. 12.5” unfinished. Please stay stitch 1⁄8” from edge. Congratulations, Liz, for winning all these beautiful blocks! |
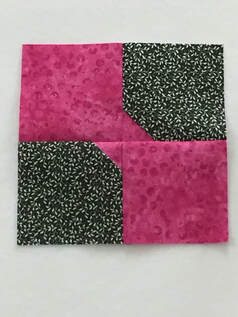
March 5, 2019 - Bowtie block - due May 7, 2019
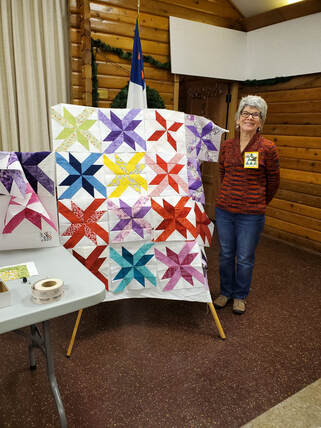
January 8, 2019 - Framed 4-patch block - due March 5, 2019
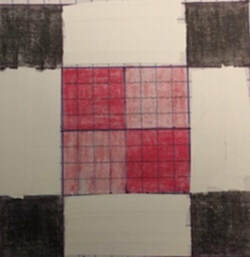
Framed Four Patch Block
EverGreen Quilters Opportunity Block - due March 5, 2019
Fabrics for Four Patch:
● Chose a color: one fabric darker, one fabric lighter, prints or solids.
Fabrics for Frame:
- ● Use black or black tone on tone for corner squares of the four-patch frame.
- ● Use a single white/off-white or cream/ecru fabric for the long bars of the four-patch
frame. Cutting instructions:
Four Patch:
- ● Fabric 1 & 2: cut (2) 4-1⁄2” x 4-1⁄2” squares
Frame: - ● Black: cut (4) 2-1⁄2”x 2-1⁄2” squares
- ● White: (4) 2-1⁄2”x 8-1⁄2” rectangles
Assemble:
Sew (2): 1 square of light color to 1 square of dark color.
Sew 2-patches into larger square, alternating colors to create center square.
Sew (2) white rectangles to opposite sides of the four-patch center square.
Sew a black square to each short end of remaining 2 white rectangles.
Sew black/white rectangles to opposite sides of center square/white rectangle unit.
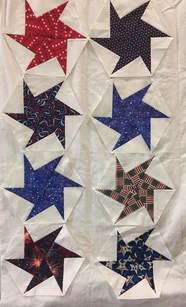
Nov 2018 - Sawtooth star w/pinwheel- due Jan 2019

Carol D. was the big winner of these cute blocks! Congratulations, Carol!
Carol sees a table runner in her future. Can't wait to see it!
Carol sees a table runner in her future. Can't wait to see it!
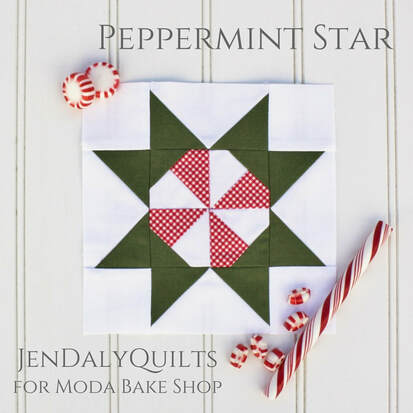
Fabrics needed:
1 fat quarter red print
1 fat quarter green print
1 fat quarter background fabric
Cutting Instructions:
From red print, cut:
1 fat quarter red print
1 fat quarter green print
1 fat quarter background fabric
Cutting Instructions:
From red print, cut:
- 2 squares, 2½” x 2½”
- 8 squares, 2″ x 2″
- 4 squares, 1½” x 1½”
- 4 rectangles, 2″ x 3½”
- 2 squares, 2½” x 2½”
- 2 squares, 2″ x 2″
March Opportunity Block - due May 1, 2018
Congratulations to Carol D. for winning these blocks!
The step by step tutorial (with diagrams) for this month’s Opportunity Block can be found at:
http://my.allpeoplequilt.com/dyn/dyn/servlet/securePdf.dyn?file=/apq/securepdf/Square-in-a-Squ are.pd :
Guidelines :
Use one color, four different shades/tints. Use solids or prints.
Add extra interest by using an increasing scale of prints. Such as small circles to increasingly larger circles or dots. Small scale florals to increasingly larger scale floral. Small scale geometrics to increasingly larger geometrics. See examples.
Project: Square-in-a-Square Finished block: 8" square (trim to 8-1⁄2” square) Cut the Fabrics :
Center:
• 1 - 3-1⁄4” square
Round 2:
• 2 - 2-7⁄8” squares, cutting each in half diagonally for a total of 4 small triangles.
Round 3:
• 2 - 3-3⁄4" squares, cutting each in half diagonally for a total of 4 medium triangles.
Round 4:
• 2 - 4-7⁄8" squares, cutting each in half diagonally for a total of 4 large triangles.
Assemble the Block :
- Sew Round 1 triangles to opposite edges of the Center Square. Then add the remaining triangles to the remaining edges of the Center Square. Press all seam allowances away from the Center Square.
- Sew Round 2 triangles to opposite edges of the Round 1/Center block square. Then add the remaining triangles to the remaining edges. Press all seam allowances away from the center of the block.
- Sew Round 3 triangles to opposite edges of the square. Then add the remaining triangles to the remaining edges. Press all seam allowances away from the center of the block.
- Trim block to measure 8-1⁄2” square.
Below are two examples of finished blocks:
These are opportunity blocks made in the past--congratulations to the winners!
February Opportunity block - Dutch Treat (tulip block) - due in March 2018
|
Your browser does not support viewing this document. Click here to download the document.
|
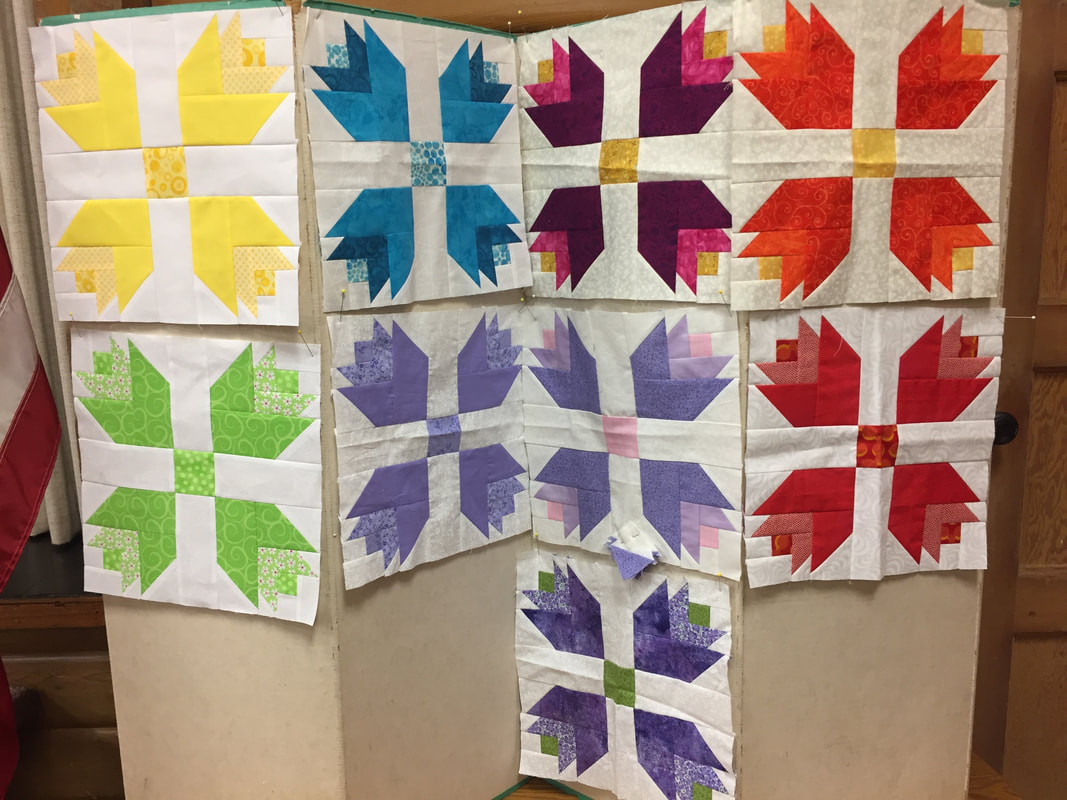
Congratulations to Sally S. for winning these Dutch Treat blocks!
|
October Opportunity block -due in Nov - congratulations to Merdie for winning these blocks!
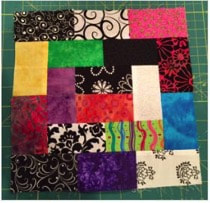
This block is from The Big Book of Scrappy Quilts by Jo Parrot
Scrappy Rectangles:
You will need 18 rectangles 3-1/2” by 2”. Make 8 of them out of black and white fabrics and 10 out of bright colored fabrics.
To sew them together, start with a colored strip and a black strip and sew lengthwise in a 1/4” seam.
Add a strip to the top and bottom of the first 2 strips.
Sew 2 more strips together on the short side. Repeat 3 more times.
Sew a two-strip unit to each side of the first unit and then on top and bottom of the unit.
Sew 3 strips together on the short sides.
Make 2 of these units. Sew to each side of the existing unit. Block should be 9-1/4” square. Mix in the black and white strips at random, see picture of block.
- August Opportunity block - due in Sept - congratulations to Georgine T. for winning these blocks!
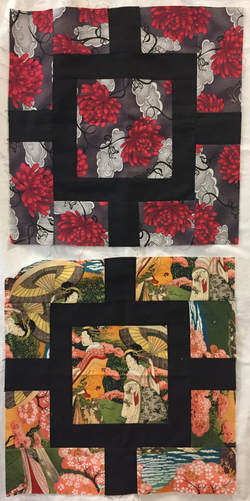
Fujita Maze by Susan Guzman. Use Asian/Oriental fabric for the background and solid black for the borders.
From the Asian print cut:
A - 1 center square 6 1/2" x 6 1/2"
B - 4 strips 3" x 6 1/2"
C - 4 rectangles 3" x 4"
From the lack fabric cut:
D - 4 strips 2 1/2" x 3"
E - 2 strips 2" x 6 1/2"
F - 2 strips 2 1/2" x 9 1/2"
Assembly:
Sew a black "D" strip between 2 Asian "B" strips. Make 2. Press
Sew a black "D" strip between 2 Asian "C" strips. Make 2. Press
Sew a black "E" strip to each side of the center "A" block. Press
Sew a black "F" strip to top and bottom of center "A" block. Press
Sew shorter pieced strips to the sides of the center block. Press
Sew the longer pieced strips to the top and bottom of the center block. Press
Square up block as needed.
Finished size is approx 14"
July Opportunity Block- due in August
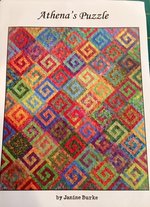
May Opportunity Block: Athena's Puzzle
due at the June business meeting.
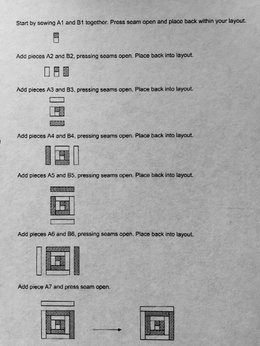
Athena’s Puzzle Block
Choose a solid color fabric (A)
Choose a Batik (B)
Cut one strip of each 2” wide the WOF.
Subcut each into the following sizes:
1) 2”x2”
2) 2” x 3-1/2” 3) 2”x5”
4) 2” x 6-1/2” 5) 2”x8”
6) 2” x 9-1/2”
7) Cut one of the solid color 2” x 11”
Block is made like a log cabin block. Start with the 2” square and keep going around adding opposite color strips until your block is 11” square.
March Opportunity Block - Crow's Nest Block - due April 4th
Congratulations to Murdie who won all the Crow's Nests!
|
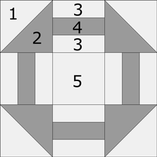
Opportunity Block- Crow’s Nest 9 “ Square block (note: photo is just for piecing, not for color choice) Make the background black or black on black fabric (#1,3,5). Make the rest a bright color (#2,4) Corners: Cut 2- 3-7/8” background squares (#1) Cut 2- 3-7/8” color squares (#2) Stripes: Cut 2- 1-1/2” x 15” strips of background (#3) Cut 1- 1-1/2” x 15” strip of color (#4) Center block: Cut 1-3-1/2” square of background (#5) Directions: Draw a diagonal line on the back of 2 color squares. Put together with a background square right sides together. Stitch on both sides of the diagonal line at 1/4”. Cut on the diagonal line. Press toward the dark fabric. You will have 4 -3-1/2” squares for the four corners. Stripes: sew the strips right sides together with the color strip in the center. Press towards the dark fabric. Cut 4 -3-1/2” squares. Lay out the 9 patch as per diagram and sew together in 1/4” seams. Press flat. |
February Opportunity Block - Red, White, Pink 9-patch
Congratulations to Liz and Jo for winning the February 9-patch blocks!
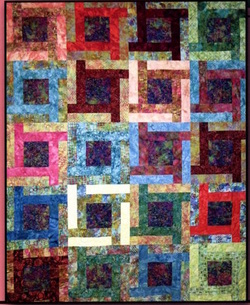
November Block: due in January 2017 - Congratuations to Bev P. for winning these blocks!
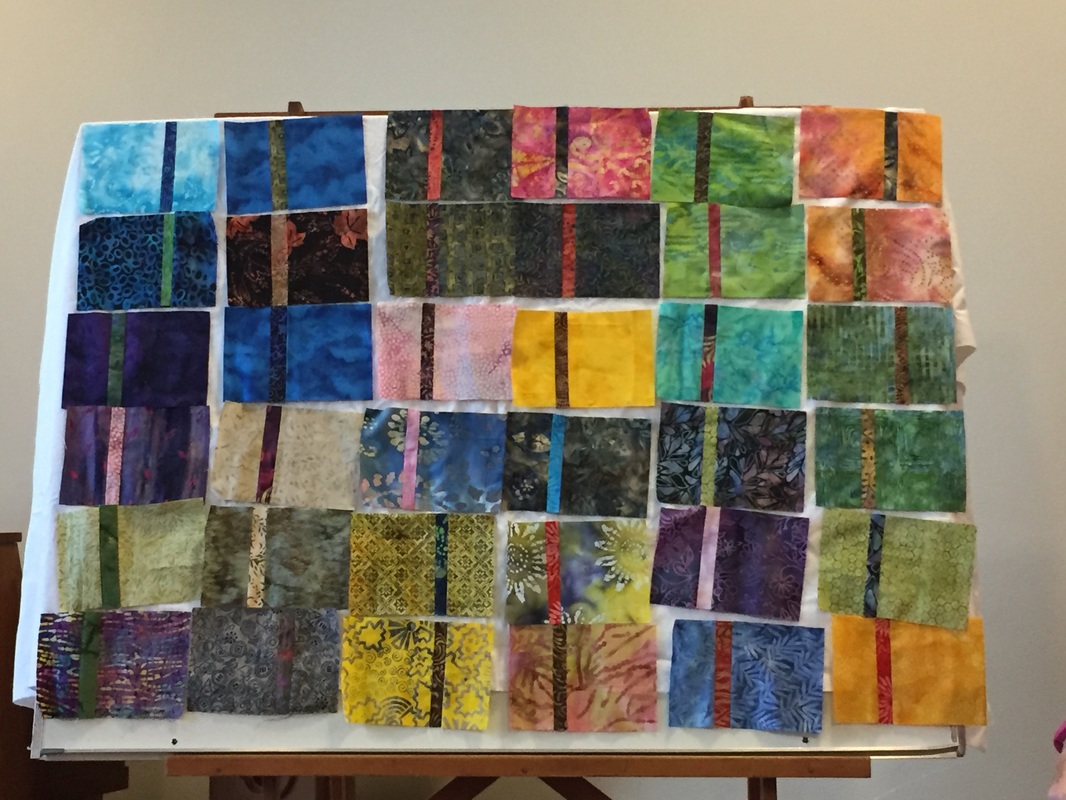
Voyager Block - 3 bright Batiks colors
Center block -- cut 1 -5” square
Strips -- cut 4- 1-1/2” strips 6-3/4” long of one color
cut 4 -1-1/2” strips 6-3/4” long of another color
(You can use 2- 27” strips and cut it into 6-3/4” strips after step 1.)
Voyager Block - 3 bright Batiks colors
Center block -- cut 1 -5” square
Strips -- cut 4- 1-1/2” strips 6-3/4” long of one color
cut 4 -1-1/2” strips 6-3/4” long of another color
(You can use 2- 27” strips and cut it into 6-3/4” strips after step 1.)
- Sew the 1-1/2” strips together, pairing up two different colors. Press seam toward the darker color.
- Sew the strips around the center block, starting with a partial seam on the right side of the block. ( sew the first strip only half way down the right side of center square) Then, working counter clockwise keep adding a strip around the center block. Finish the first seam last.(seam #5 is a continuation of what you started with, but now the #4 strips are in place so you can attach #1 to it.
- Press block flat.
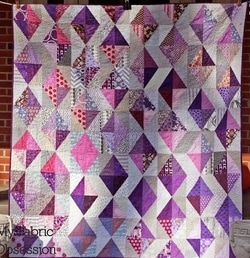
September 2016
Congratulations to Marilyn D-R for winning these blocks!
Purple Diamonds
Purple Diamonds Quilt Block Cut 2 rectangles 3-7/8” x 6-7/8” of background fabric (gray or white) Cut 2 rectangles 3-7/8” x 6-7/8” of purple fabric
Draw a diagonal line on the back of all 4 pieces and cut with a rotary cutter. Pair up a background and a purple fabric right sides together and sew a 1/4” seam. Rectangles should be 3-1/2” x 6-1/2”. Repeat for other 3 rectangles. Make sure you have a purple diamond layout in the center.
Sew the 4 rectangles together to make a purple diamond. You can mix up the purple fabrics or have them all the same.
You can make the background all gray or white or mix it up. Make 1 block.
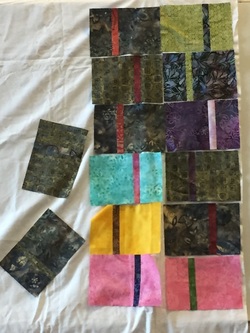
July 2016
Juxtaposition Quilt Block
This is a batik block made of 2 contrasting colors. Each block is 3 pieces.
A= 2-3/4" x 5-1/2"
B= 1-1/3" x 5-1/2"
C= 5" x 5-1/2"
A and C are the same fabrics. B is the contrast fabric. Sew together using 1/4" seams. Finished block is 8" x 5-1/2". Make 2 opposite blocks from any color batik fabric. Remember to use high contrast between fabric B and fabrics A&C.
Congratulations to Carol D. who won these blocks at the August business meeting!
May 2016
Patchwork Wheel Block
8 3-1/2” squares in various colors/prints
8 4-1/4” squares in various colors/prints
8 4-1/4” squares in white or white on white background fabric
This is a scrappy block so use lots of colors in it. Keep the background white.
1. Draw a diagonal line on the back of all the white squares. Match them up with a print square the same size, right sides together. Sew a scant 1/4” seam on both sides of your line. Cut on the line and press to the dark fabric to make 2 half square triangles. Repeat with other squares to make a total of 8 half square triangles. Trim squares to 3-1/2”.
2. Lay out 4 half square triangles in the center with white triangles facing inward to make a white diamond in the middle. Place the other 4 half square triangles on the 4 corners with the white triangle facing outward. Fill in sides with 2 squares of color between corners.
3. Stitch block together in rows, press seams, and stitch in opposite rows, lining up seams. Press block. Makes a 12-1/2” block. Do not trim.
***There is a free pattern and video directions for this block on craftsy.com. Click here to go to that page.
Or just search for "Patchwork wheel quilt block" by Don’t call me Betsy.
March 2016
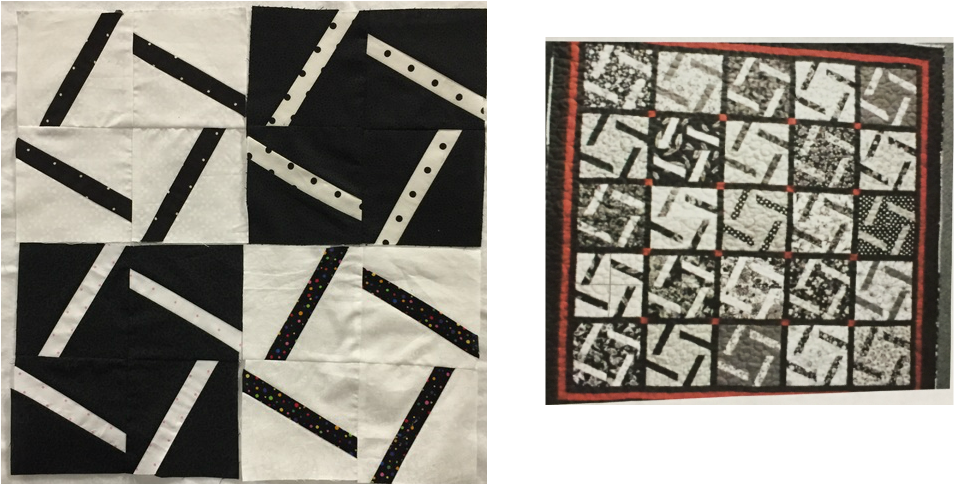
Modern Sticks Block
Instructions:
This is a black and white block. If possible, make one black and one white. You may have very small amounts of other colors only seen up close.
· Cut 4 - 4 1/2" squares of black or black on black fabric.
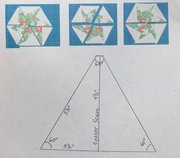
· Cut 4 - 1 1/4" X 4 1/4" strips of white, 5 1/4" long with ends cut at 60 degrees
· Cut 4 - 4 1/2" squares of white or white on white fabric.
· Cut 4 - 1 1/4" X 4 1/4" strips of black,5 1/4" long with ends cut at 60 degrees
All seams are 1/4" and all marks are on right side of fabric.
· Mark a line on top and bottom of squares, 1 inch from opposite corners. Draw a line connecting marks on all four squares. Cut on the line.
· Sew strip, right sides together, between two block pieces. Press blocks. Sew the four blocks together with 1 inch space always in the middle.
· Press and square up if needed. Finished block is 8 1/2" X 8 1/2".
January 2016
Patchwork Heart Block
Instructions:
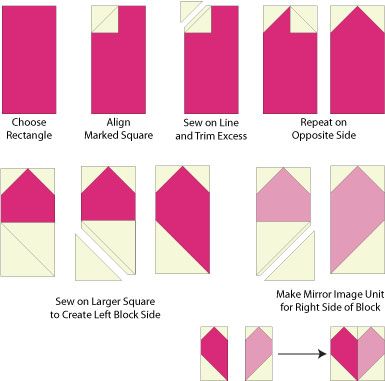
1. Cut two red or pink rectangles 3 1/2" x 6 1/2"
Cut four 2" x 2" white squares; draw a diagonal line on the back of each one.
Cut two 3 1/2" x 3 1/2" white squares; draw a diagonal line on the back of each one.
2. choose 1 rectangle of red or pink fabric; align a 2"x 2" white square RST in the upper left hand corner as shown. Sew on your line. Trim to 1/4" and press ope or to one side.
3. Sew a 2"x2" white square on the opposite side on the upper right corner. Sew, trim and press as before. Make 1 more block in the same manner.
4. Using the same method, sew the larger white block on the bottom left side of one block, trim and press. Repeat on the other block on the right side.
5. Sew the 2 heart blocks together vertically to complete the block. Press flat.
Block should be 6 1/2" x 6 1/2".
RST = right sides together
all seams = 1/4"
from about.com by Janet Wickell


